Blurry images are not a good sight in pictures, especially when they are unintended by the user. However, even the slightest movement of the camera can cause some amount of image blur, which is why an image sharpener is a highly used feature in many photo editing applications. You should look into VanceAI Image Sharpener if you want your personal photos to be clear or if you are a professional trying to make high-quality content. It can sharpen blurry images both online and offline. This AI based image sharpener tool from VanceAI offers interesting features and a sophisticated UI design. This review touches upon all of those aspects and more.
Advantages of an Image Sharpener Tool
An image sharpener is definitely a useful tool to have among other photo editing and enhancement tools because it can sharpen an image while also making it look much better than before. Not to mention that image blur is a fairly common thing that photographers face. While image blur can be intentionally produced within an image, it can also be a hindrance when the same effect is unwanted. Image blurs can cause an image to look blank and vague. By using an image sharpener to sharpen image details, you can make an image look high-definition. A high-definition image, such as a product photo, can do wonders for your business, for example. High-definition images of landscapes and lifestyles also go really well with blogs and online content that involves audience engagement.
VanceAI.com takes the image sharpener tool formula and adds its own design and features on top of it. The VanceAI Image Sharpener tool includes a feature of choosing the type of blur that the user wants to tackle. Once you get to the Workspace, you have the option of choosing either Motion, Lens, or Soft blur and the tool will then remove the kind of blur that is chosen. Naturally, the user may not know the kind of blur that is present in the image, so in that case, they can choose the General option instead. Apart from that, it is also possible to adjust the Sharpness level that you want in the final image. By being able to alter the image in such ways, users get more options with their images and are able to present their photos how they want.
How to sharpen the blurry images with VanceAI Image Sharpener?
This guide will inform you how to sharpen blurry images with the Image Sharpener online and on the software VanceAI PC.
Step 1: Use the AI image sharpener link to access the web page of the tool. From there, click on Upload Image to open up the Workspace.
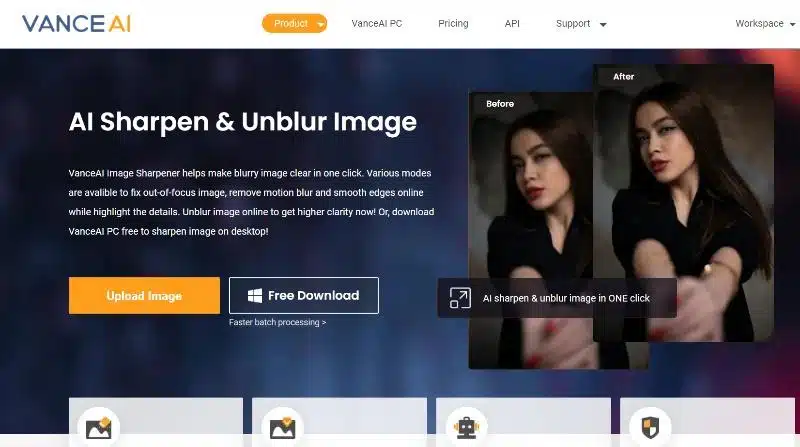
Image Credit: VanceAI
Step 2: At VanceAI Enhancer Workspace, you will be able to upload images, choose blur type options, and more. After uploading an image, click on Start to Process to initiate image sharpening.
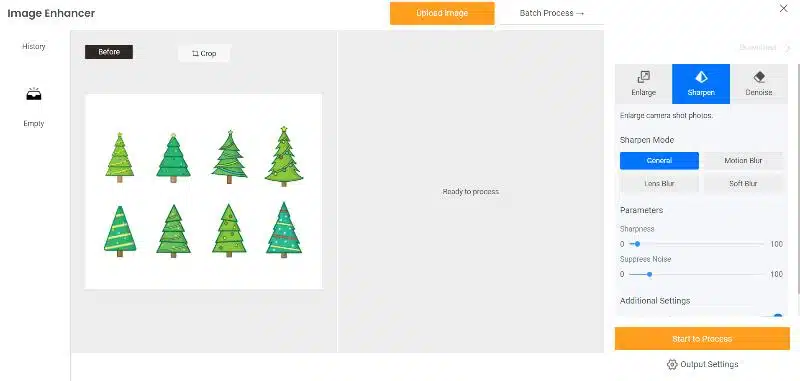
Image Credit: VanceAI
Step 3: Within a few seconds, you will see the final image load onto the screen. Click on Download Image to save the image on your device.
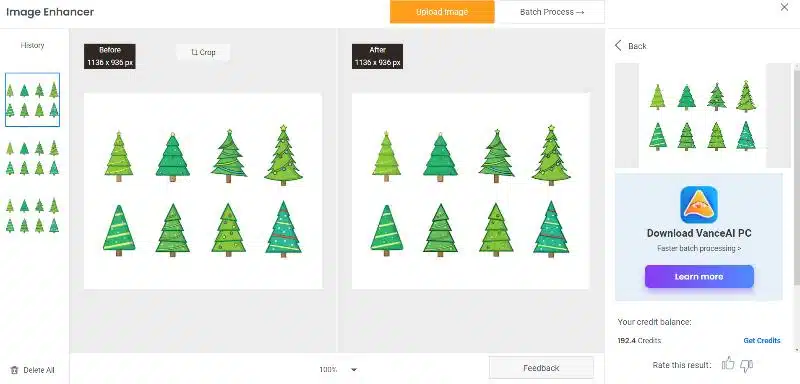
Image Credit: VanceAI
How to Use VanceAI Image Sharpener on VanceAI PC?
Step 1: You can also unblur image using the VanceAI PC software. Use the VanceAI PC link given above and download the software for free.

Image Credit: VanceAI
Step 2: Run the software after installation. Choose the Sharpen option from the home page. The following page will show all the options, similar to the online Workspace on the website.

Image Credit: VanceAI
Step 3: Upload the image using the ‘plus’ symbol and set your preferences. The final image will appear on the screen after a few seconds of processing.
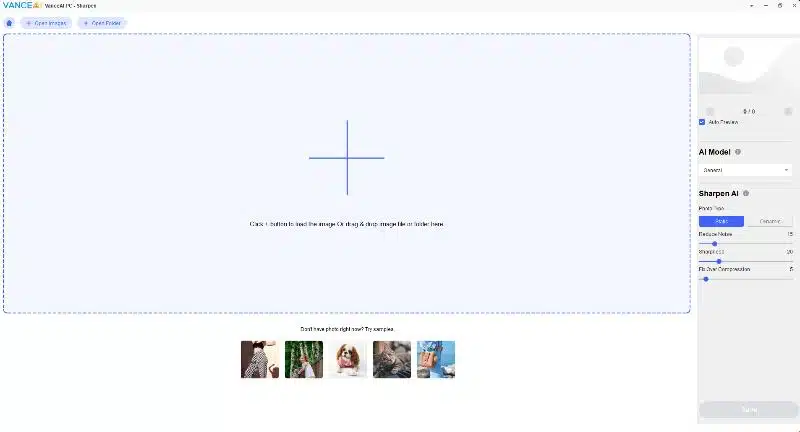
Image Credit: VanceAI
Performance of VanceAI Image Sharpener
We will now process some images with each blur type and see the performance.
1. General Blur
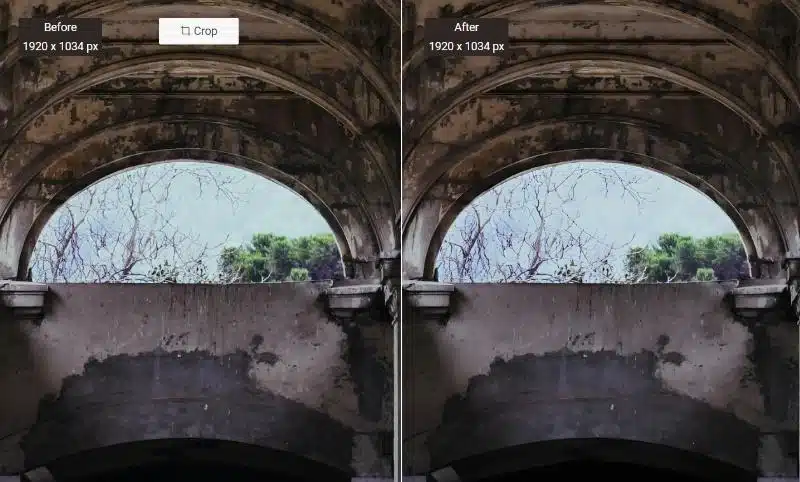
Image Credit: Unsplash
The first type of blur type that we’re looking at is the General blur. In this case, the tool will do an overall sharpening of the image, as the option name suggests. Users who are not sure about the type of blur to choose for their image can go for this option instead. As we can see from the example image above, the Image Sharpener smoothes out the surface of the wall and reduces the blurriness that is present noticeably in the Before image.
2. Motion Blur
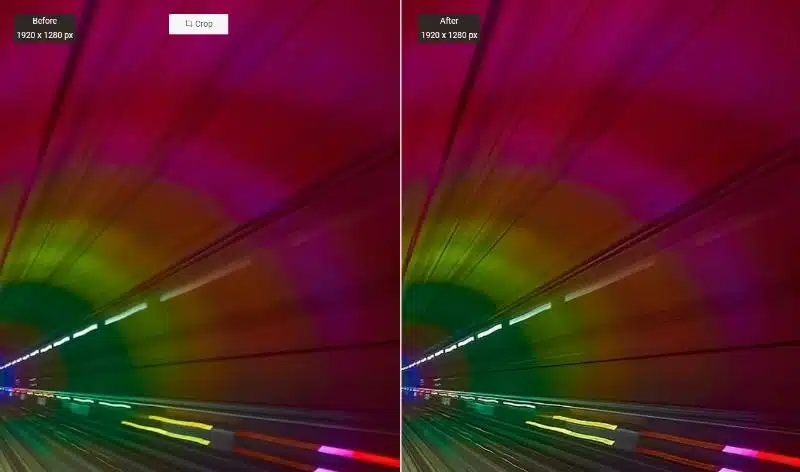
Image Credit: Unsplash
The Image Sharpener tool enables users to tackle motion blur as well, which is a type of blur that deals with moving objects in the photo. The object could be anything but motion blur usually appears as a line or multiple lines forming around the object. By choosing motion blur in the Workspace, you can make the image sharper by reducing the impact of the blurriness that occurs near the object or similar. As we can see from the example image, the blurry lines appear less potent and the colors shine better due to the lack of blur.
3. Lens Blur
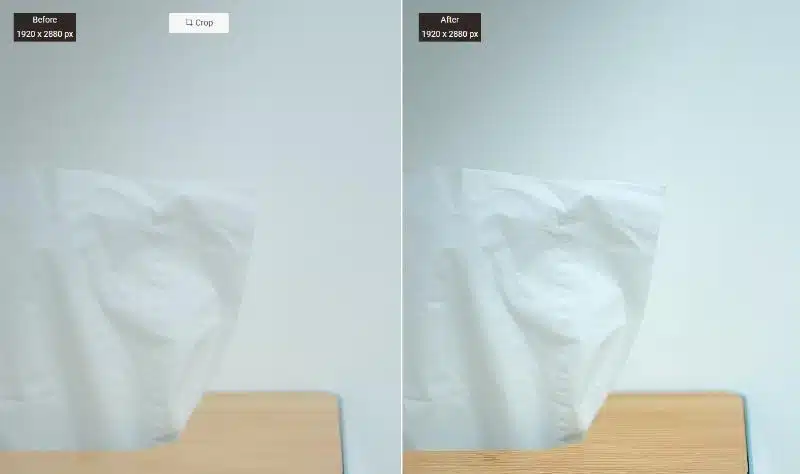
Image Credit: Unsplash
Lens blur can cause the focused object to appear too blurry as well as the background. After processing the image by selecting the lens blur option in the Workspace, the difference between the Before and the After image is clear as day. Looking closely at the After image, it is easy to see the details on the tissue paper as compared to the previous image. Not to mention that because of the increased sharpness, the distinction between the focused object and the background is clearer in the After image. There is a color shift in the table as well.
4. Soft Blur
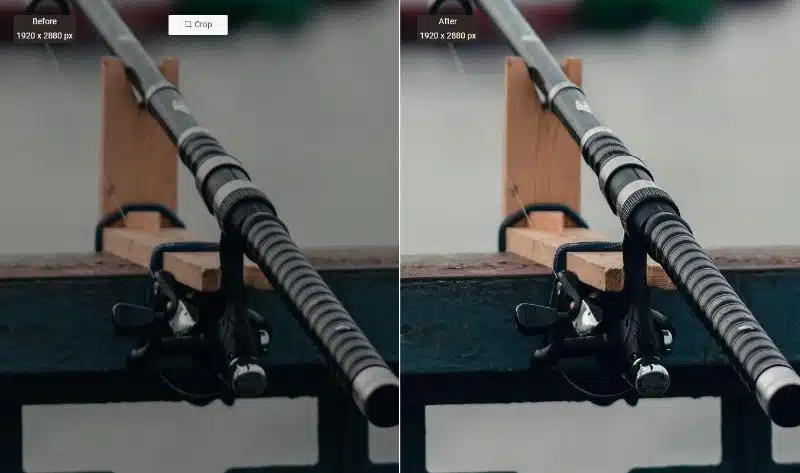
Image Credit: Unsplash
Yet again, the Image Sharpener brings a big change to the image after processing. By selecting the soft blur option, the tool superbly enhances the finer details of the main object in the photo. Not only are the details of the photo much clearer, but there is also a change in the tone of the image. The After the image is much brighter than the Before image, which also helps in reflecting the finer details of the photo. The objects in the immediate background, such as the ledge, also appear sharper than before.
Conclusion
When it comes to any VanceAI tool, including the Image Sharpener, we also have to count the extra features that VanceAI provides. The AI based performance coupled with the platform’s impressive UI design pushes the Image Sharpener ahead of the curve. The limitation that the Image Sharpener faces is that it can tend to be unresponsive at times. Not that it is a major drawback, as it does not last for long, but it is nonetheless a potential issue when users want to work on some time for a longer duration.
Besides this, however, the Image Sharpener is definitely worth trying out. Considering that VanceAI subscriptions start from just $4.95 per month while providing 100 image credits and exclusive features like batch processing, there is hardly any reason to skip buying it. VanceAI is also a platform that puts consideration into accessibility and VanceAI JA is one of their recent additions to the platform, making the platform available in Japanese. With all the features and accessibility options, you can sharpen images online easily.
Additional Options from VanceAI
VanceAI offers many photo editing tools and features that allow users to have more options with their photos. VanceAI Image Sharpener is one of the productive tools to boost image quality. By using their Workflow feature, you can queue up multiple VanceAI tools to have a combined effect on an image. The Workflow feature can be accessed from the Workspace itself. Some tools naturally work better with VanceAI Image Sharpener. For example, you can unblur images and improve the quality of the same image by using VanceAI Image Enhancer. On a similar note, you can also get rid of image noise or film grain from pictures with the help of VanceAI Image Denoiser tool. Besides these tools, VanceAI offers a free to use PDF processing tool. You can access this tool online by clicking on VancePDF.com


